Open XeditingTV to edit video files non-destructively.
Right click on the song and choose XeditingTV.
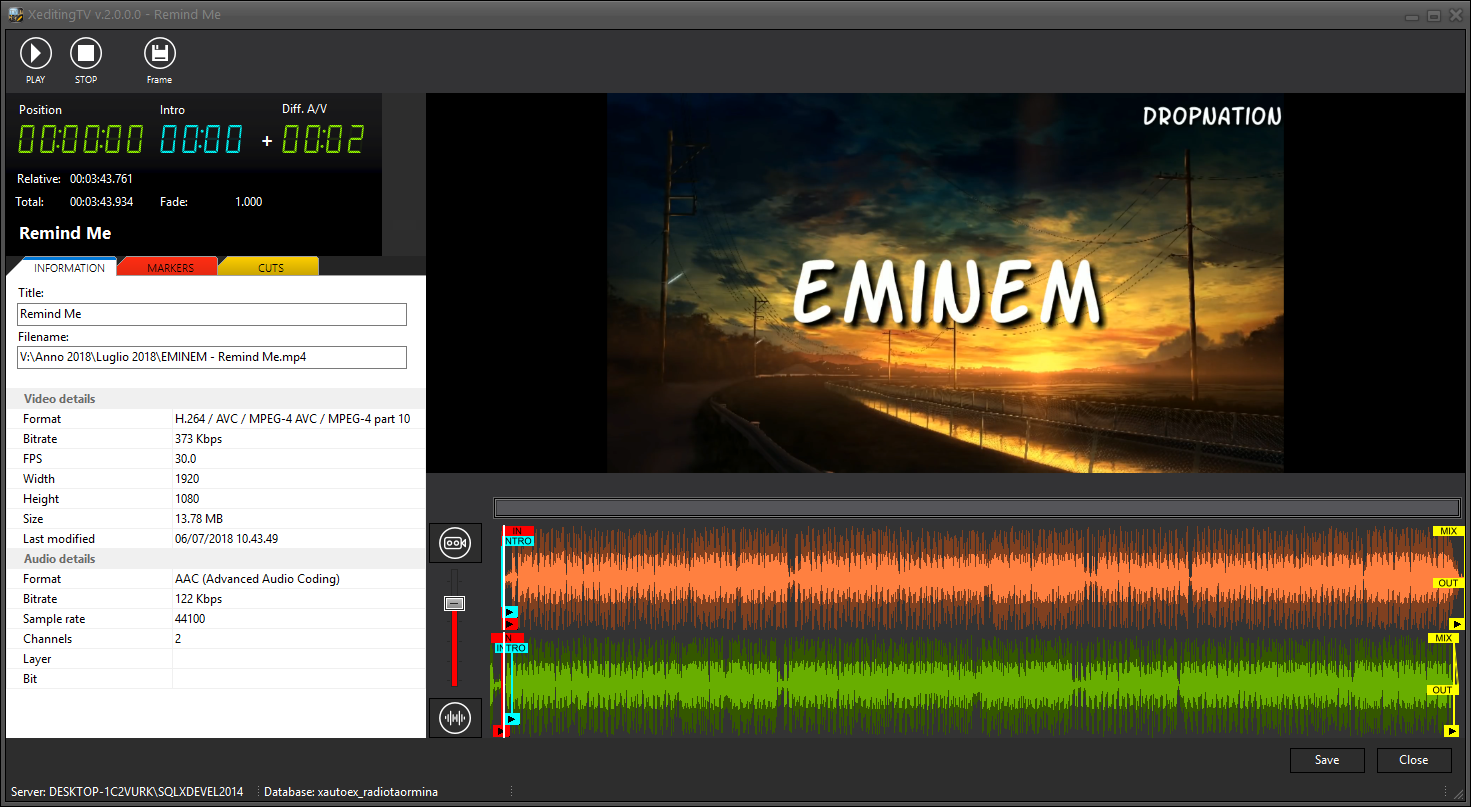
XeditingTV shows the waveform of the audio from the video file (in orange), and the waveform of the audio file (in green).

The display shows the total duration of the video, the duration of the video after editing, the duration of the intro and any differences in duration between the video and the audio.
|
Edit the video so that its duration is equal to that of the audio. |
If the video is shorter, the display shows the difference in duration in red. The excess audio is highlighted in red on the video waveform.
If the video is longer, the display shows the difference in duration in green. In this case the video is cut when the song played by Xautomation ends.
Use the Play  and Stop
  buttons to start or stop the playback of the song. Click on the waveforms to listen to the song from the click point.
Click on the Frame button to save a frame of the video to disk when the playback is started.
The frame is used as a preview in the XautoTV playlist.
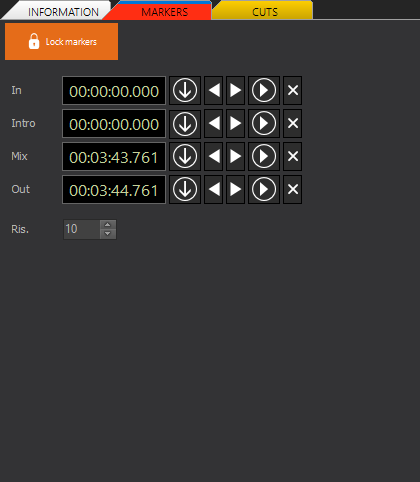
Click Markers and disable the Lock markers button to edit the markers.
This way you can drag the editing markers directly onto the video waveform.

The IN marker indicates the starting position of the video. Move the IN marker on the video to move the beginning of the audio.
The INTRO marker indicates the position where the title graphics are shown. Move the video INTRO marker to the desired position.
The MIX marker indicates the beginning of the fade with the next video. The OUT marker indicates the end of the video. Move the video MIX and OUT markers to the audio MIX and OUT markers.
|
To position the markers more precisely, you can zoom in on the waveforms by resizing the scrollbar or using the mouse wheel. |
The volume fader  allows you to pre-listen to only the video part, only the audio part or both.
|
Position the fader in the center to check the sync between the video audio and the audio played on Xautomation. |
Markers can be positioned using the controls in the Markers section.
While XeditingTV is in Play, use the Set marker button  to move the corresponding marker to the position reached by the pre-listening.
Use the arrows  to move the marker forward or backward. The Resolution (Ris.) Value below sets the number of milliseconds for the marker to move.
Use the Play marker button  to pre-listen to the track from the corresponding marker position.
Use the Reset marker button  to move the corresponding marker to the default position.
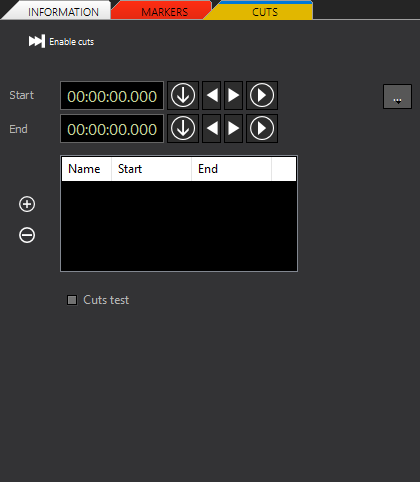
The Cuts section allows you to define portions of the video that must be skipped during the airing.

Click Add cut  to add a CUT Start marker and a CUT End marker.
Use the marker controls to move the cut portion.
The cut portion is highlighted in red on the video waveform. It is possible to save the video by eliminating the part of the cuts through the Options button  , by clicking on Save file.
Enable the Cuts test option to skip the cut portions on the video during pre-listening.
Enable the Enable cuts option to use the cuts when broadcasting.
It is possible to remove cuts in the list using the Remove selected cut button  .
.
After making all the desired changes, click on Save, then on Close.


