
The Low Title and High Title objects show the information of the song on the air (title, artist, year, label, cover).
In order to be used, the objects must be inserted in the Playout.
The low title appears when the track's INTRO marker is reached and remains on the air for 5 seconds.
To create a low title, go to Systems > Playout and follow the following steps:
1.Drag a layer object from the CG Generic list into the central preview pane.
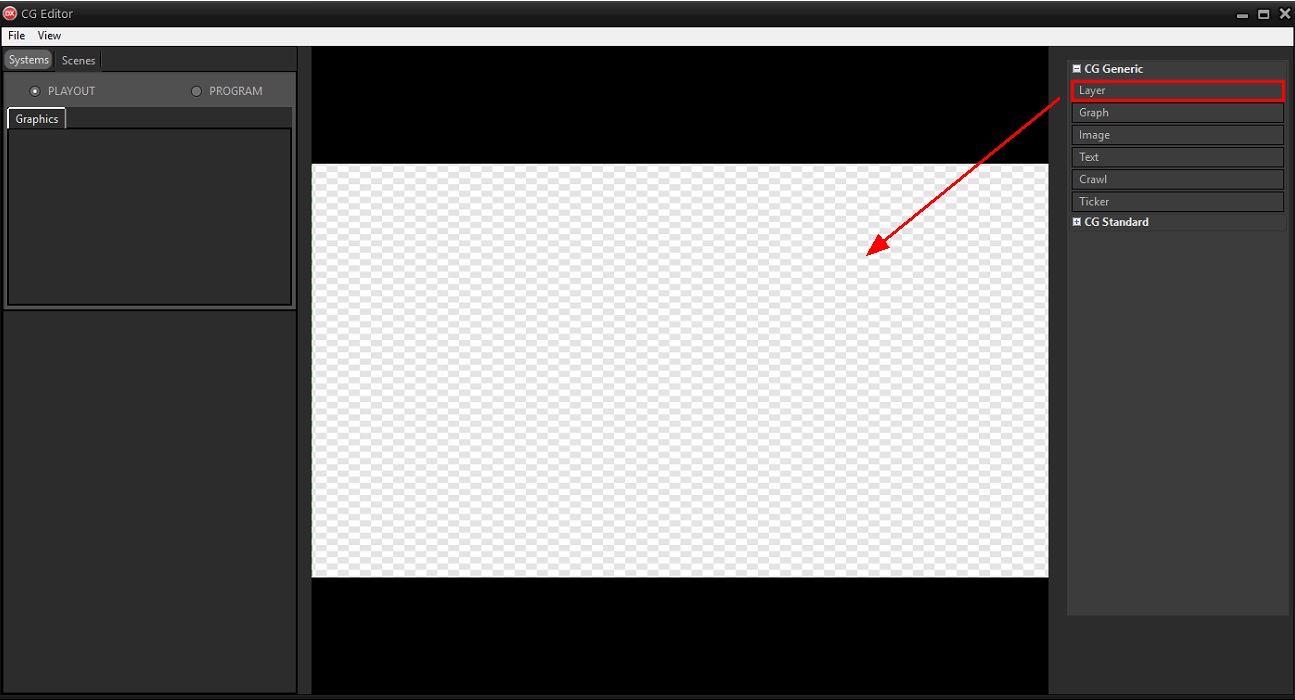
2.Rename the layer, by right clicking > Rename on the layer object, in title.down, then resize it and position it where you want to show the low title.
3.Assign the placeholder to the layer, by right clicking > CG Group > <TITLEDOWN>.
The layer becomes the main container of our low title.
4.Drag another layer object from the CG Generic list to the central preview pane, then insert it inside title.down (by dragging).
5.Rename the new layer to title.down.info.
This layer will be used as a secondary container for all textual information of the track.
6.Drag a text object from the CG Generic list into the central preview pane, then insert it inside title.down.info.
7.Change the workspace of the text object if desired, but only after inserting it in the title.down.info layer.
8.Rename the object, then resize it and position it where you want to show the title.
9.Assign the placeholder to the object, by right clicking > CG Element > <TITLE>.
In this way the text of the object is replaced by the title of the track on the air.
Repeat the procedure by dragging other text objects into tile.down.info and repositioning them.
It is possible to clone the text object already created to keep the same attributes.
Assign the available CG Elements placeholders to the other text objects: <ARTIST>, <YEAR>, <RECLABEL>.
This creates the text fields which will be automatically filled with the artist, title, year and record label of the song being broadcast.
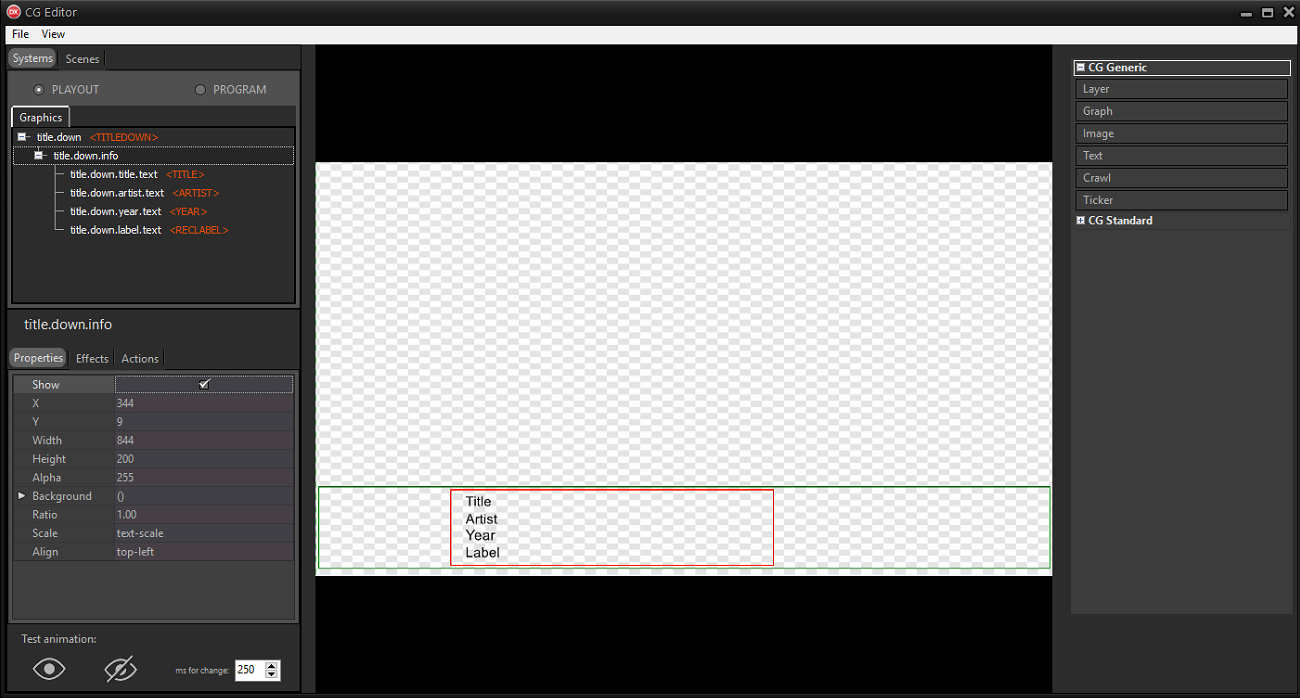
From the Properties section in the lower panel you can choose the font and color of the text.
In the Properties > Scale option, text-scale must be selected.
In this way the text is restricted when the title of the piece reaches the size limits.
To prevent the text from becoming illegible when the title is very long, increase the size of the object.
To test the result, enter text in the Text field.
After establishing the size and position of the individual text objects, you can reposition and resize title.down.info.
The objects inside are automatically adapted to the new dimensions of the subgroup.
It is now necessary to create a default cover which will serve as a placeholder for the cover of the transmitted track.
1.Move title.down.info within the margins of the title safe area and leave space for the cover.
2.Drag an image object from the CG Generic list into the central preview pane.
3.Select a square reference image from the system folders.
A default dummy.png image is available in the T:\lib\Media folder.
4.Insert the image into title.down.
5.Rename, resize and position the object where you want to show the cover and within the margins of the title safe area.
6.Assign the placeholder to the object, by right-clicking > CG Element > <IMAGE>.
In this way the image is replaced by the cover of the track on the air.
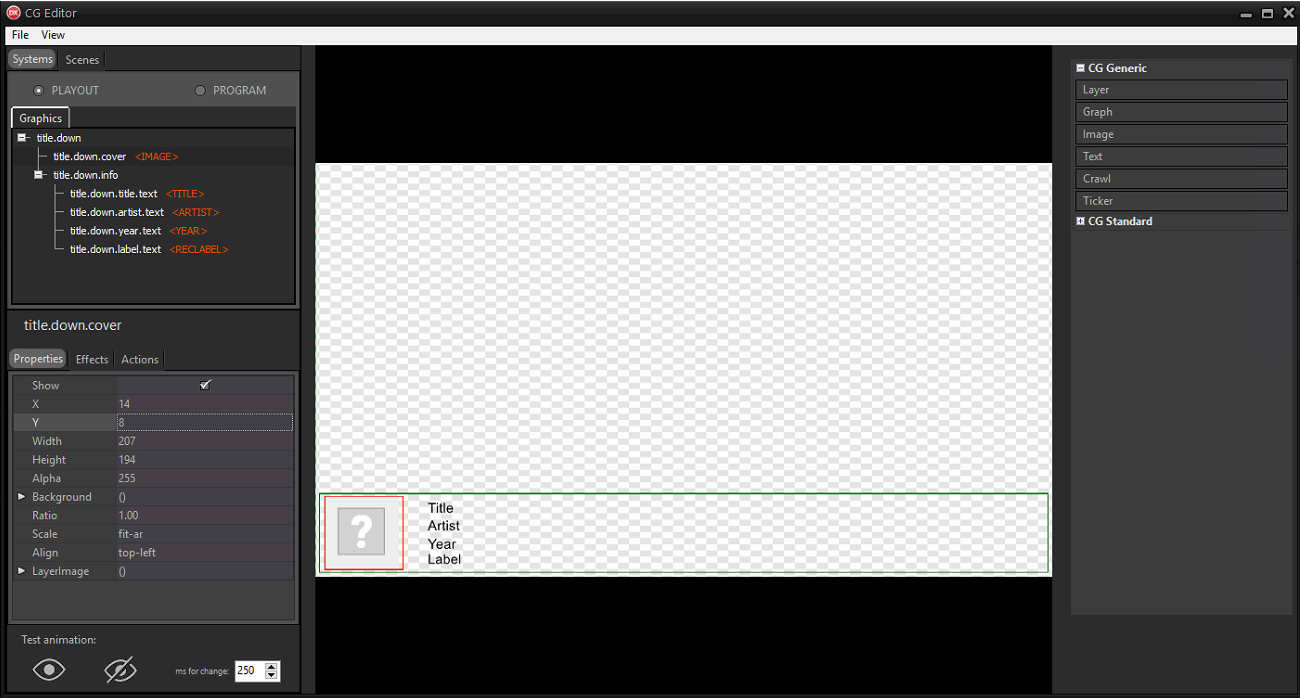
Other layers and objects can be added within the main group title.down to enrich the title graphics. It is possible, for example, to create a background.
To create a background for the low title group:
1.Drag a graph object from the CG Generic list to the central preview pane, then place it inside title.down and below all other objects.
2.From the Properties section in the bottom panel choose the type of shape and other parameters.
Use a rectangle as the background for the Low Title.
3.Select rect in the Properties > LayerGraph > Type option.
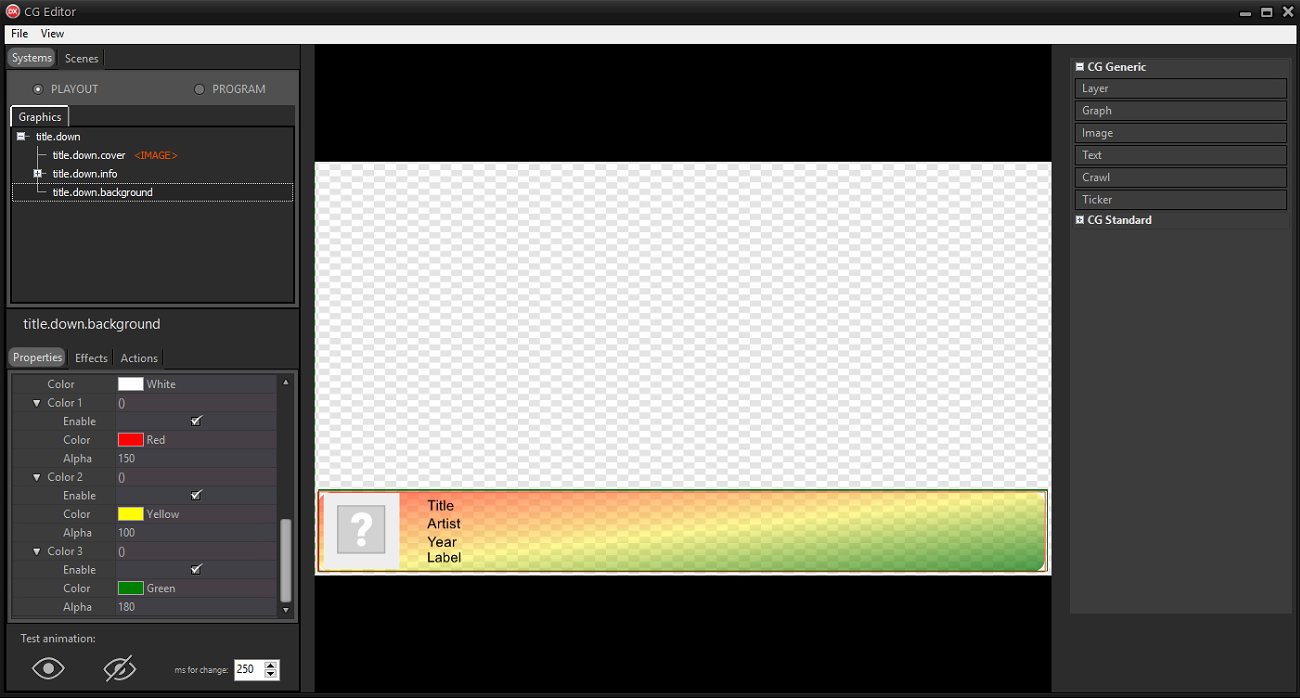
It is possible to apply a border by increasing the value of the Outline option, coloring the border and deciding whether to round the shape by increasing the value of the Corner option.
It is possible to enable up to 3 colors to create a gradient. Enable only Color 1 to create a solid color background.
Use the Actions > Full screen option to resize the graph object and cover the entire area of the title.down layer.
The graph object is resized to full screen and cover the entire area of the title.down layer.
Effects and animations can be applied when the group or individual objects are shown or hidden.
Select an object or group and move to the Effects section.
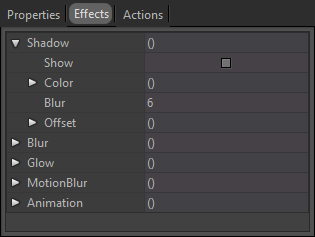
Enable and adjust the effects of shadow, glow and blur.
In Animation, you can choose motion effects when the object is shown or when it is hidden.
Enable Fade to apply an incoming or outgoing fade to the object.
Choose the type of movement to be performed and the direction. The object, in fact, can appear or hide using a blur, a move or a resize (Squeeze).
To test the result use the Test animation buttons below. Use the value ms to the side to increase or decrease the speed of the preview.
When objects with motion effects already applied are contained in a group, enable the Items function on the group. In this way the group considers the animations of the individual objects and executes them in sequence when it must appear or hide.
To learn more about how the low title works and to have an example of how objects can be combined, drag the ready-made low title from the CG Template list.
Click File > Save on-air to apply the changes to the CG on the air.
On Xautomation, select one or more tracks and access the Properties. In fact, it is possible to control which elements to show based on the tracks that are transmitted.
In the Video section:
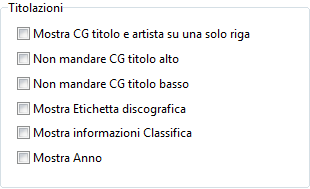
•Enable the Show CG title and artist on one line option to have Artist - Track title on one line.
•Enable the Do not send CG High Title option to hide the High Title. Useful for hiding the title on jingles or bases.
•Enable the Show record label option to show the label of the song on the air. Make sure the label was first entered in Properties > Registry.
•Enable the Show Rank information option to show the ranking position of the song being aired. Make sure you have enabled the option Retrieve ranking information from EarOne on Properties > Metadata.
•Enable the Show Year option. Make sure the year has been entered in Properties > Metadata.
For the cover of the track, make sure it has been entered in Properties > Metadata. You can set a cover manually or search for it through iTunes or EarOne.
Click Apply, then Close.
|
We recommend that you enable the option Download artwork in high resolution on Edit > Settings > Others. This downloads the cover with the highest quality available. |
On Edit > Settings > Video 2 enter a path for the default Artwork to be shown when the cover of the track on the air is missing.
Start playback on Xautomation and check the changes made on the CG and on the archive.

