Titles 1, Titles 2 and Message objects are the lower third for displaying messages.
In order to be used, the objects must be inserted in the Program and in the Playout.
To create the objects, go to Systems > Program and follow the following steps:
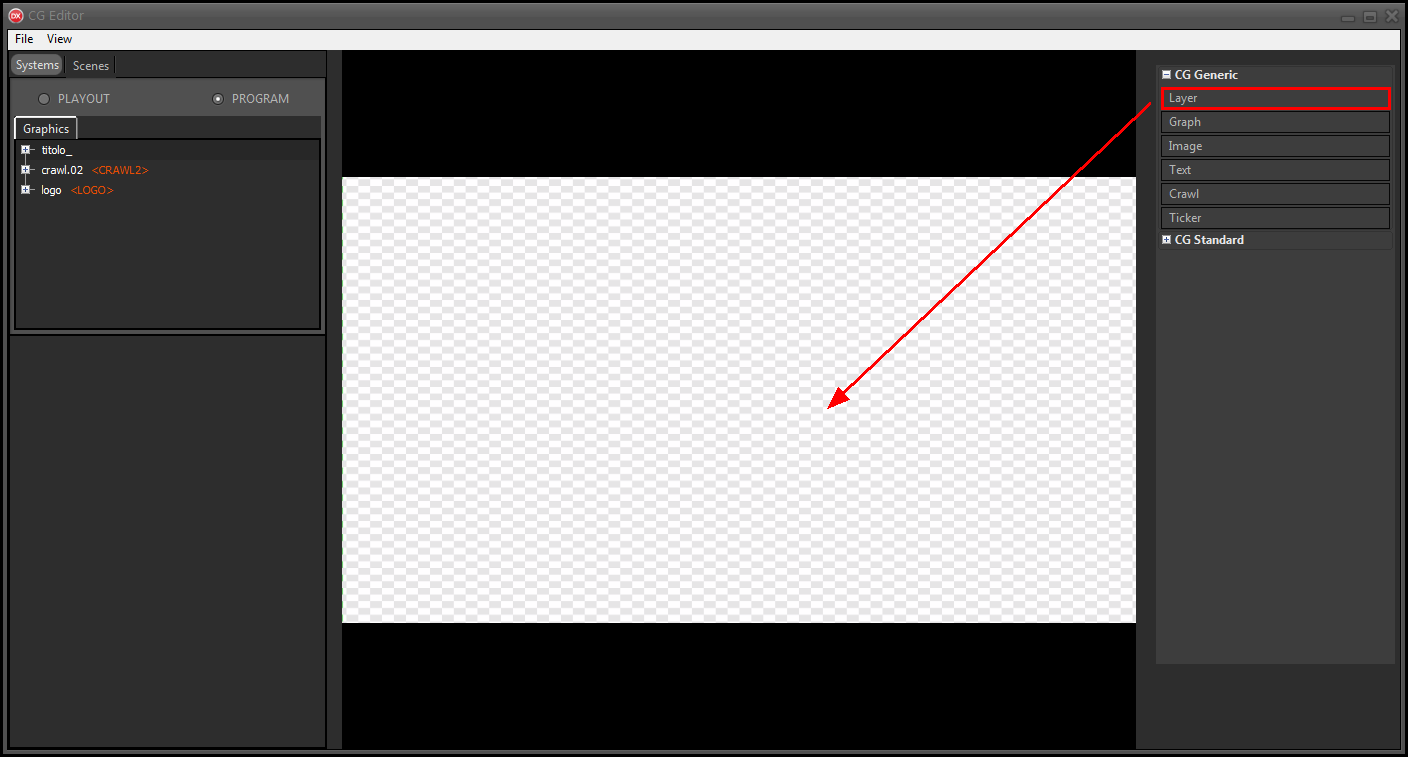
1.Drag a layer object from the CG Generic list into the central preview pane.

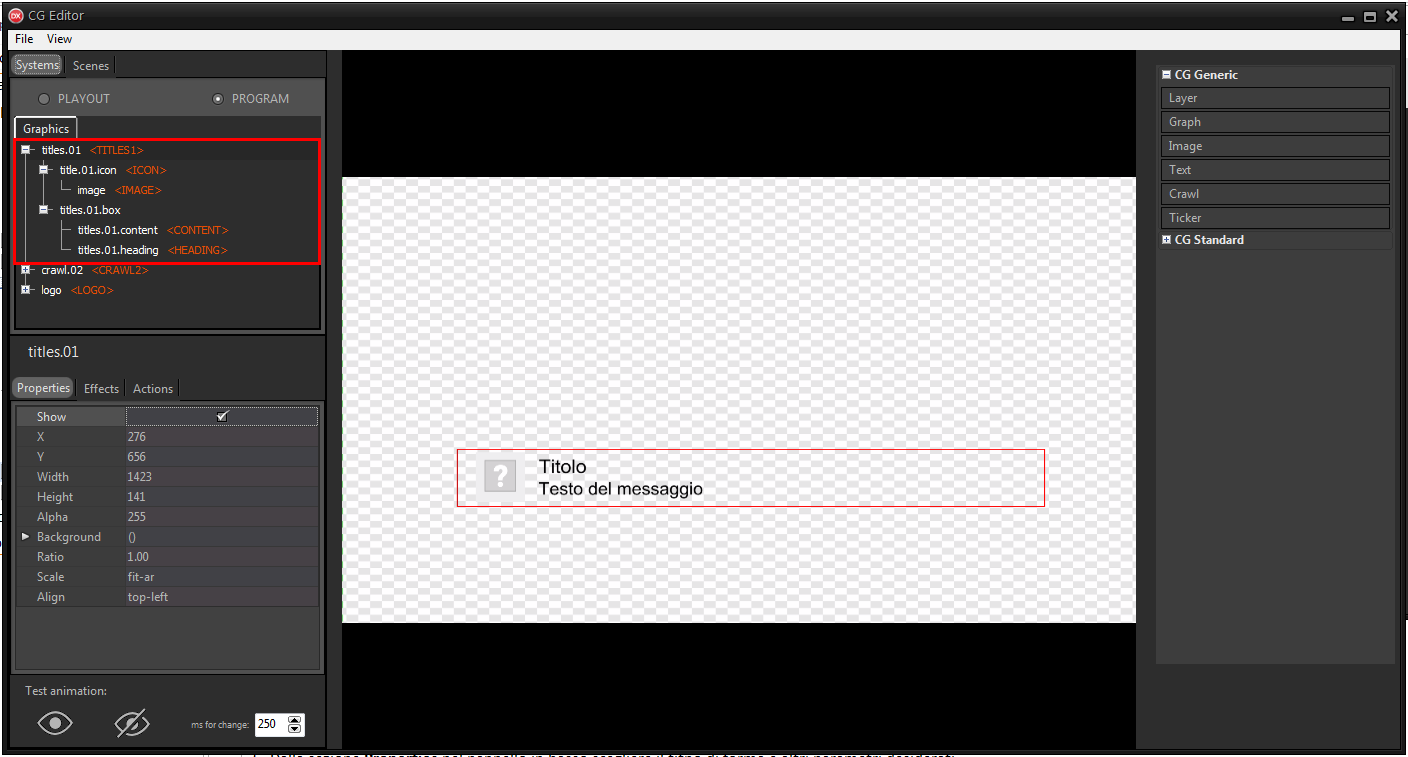
2.Rename the layer in titles.01, then resize it and position it where you want to show the lower third.
3.Assign the CG GROUP > <TITLES1> placeholder to the layer.
In this way the layer becomes the main container of our lower third.
4.Drag another layer object from the CG Generic list to the central preview pane, then insert it inside titles.01.
5.Rename the new layer in titles.01.box.
This layer will be used as a secondary container for textual message content.
6.Drag a text object from the CG Generic list into the central preview pane, then place it inside titles.01.box.
7.Rename the subject, then resize it and position it where you want to show the title of the message.
8.Assign the CG Element > <HEADING> placeholder to the object.
This replaces the subject text with the title of the message.
9.From the Properties section in the lower panel you can choose the font and color of the text.
In the Properties > Scale option, text-scale must be selected. In this way the text is restricted when the message title reaches the size limits.
To prevent the text from becoming illegible when the title is very long, increase the size of the object.
To test the result, enter alternative text in the Text field.
10.Repeat the procedure by dragging another text object into titles.01.box and repositioning it.
It is possible to clone the text object already created to keep the same attributes.
|
The second text object is the content of the message and may contain very long text. Check the font and object size. Enable the Properties > LayerText > Font > Word-break option to break the text and wrap it over several lines. |
11.Assign the CG Element > <CONTENT> placeholder to the object.
This replaces the subject text with the content of the message.
12.After choosing the size and position of the individual text objects, move and resize titles.01.box and leave room for the message image.
13.Drag a layer object from the CG Generic list to the central preview pane, then insert it inside titles.01.
14.Rename the new layer in titles.01.icon.
This layer will be used as a container for the image of the messages.
15.Resize the layer with square proportions and position it where you want to show the image of the message.
16.Assign the CG Element > <ICON> placeholder to the layer.
17.Drag an image object from the CG Generic list into the central preview pane.
Select a square reference image from the system folders.
A dummy.png image is available in the T:\lib\Media folder.
18.Insert the image into titles.01.icon and rename the object.
Use the Actions > Full screen option to cover the entire area of titles.01.icon.
19.Assign the CG Element > <IMAGE> placeholder to the object.§

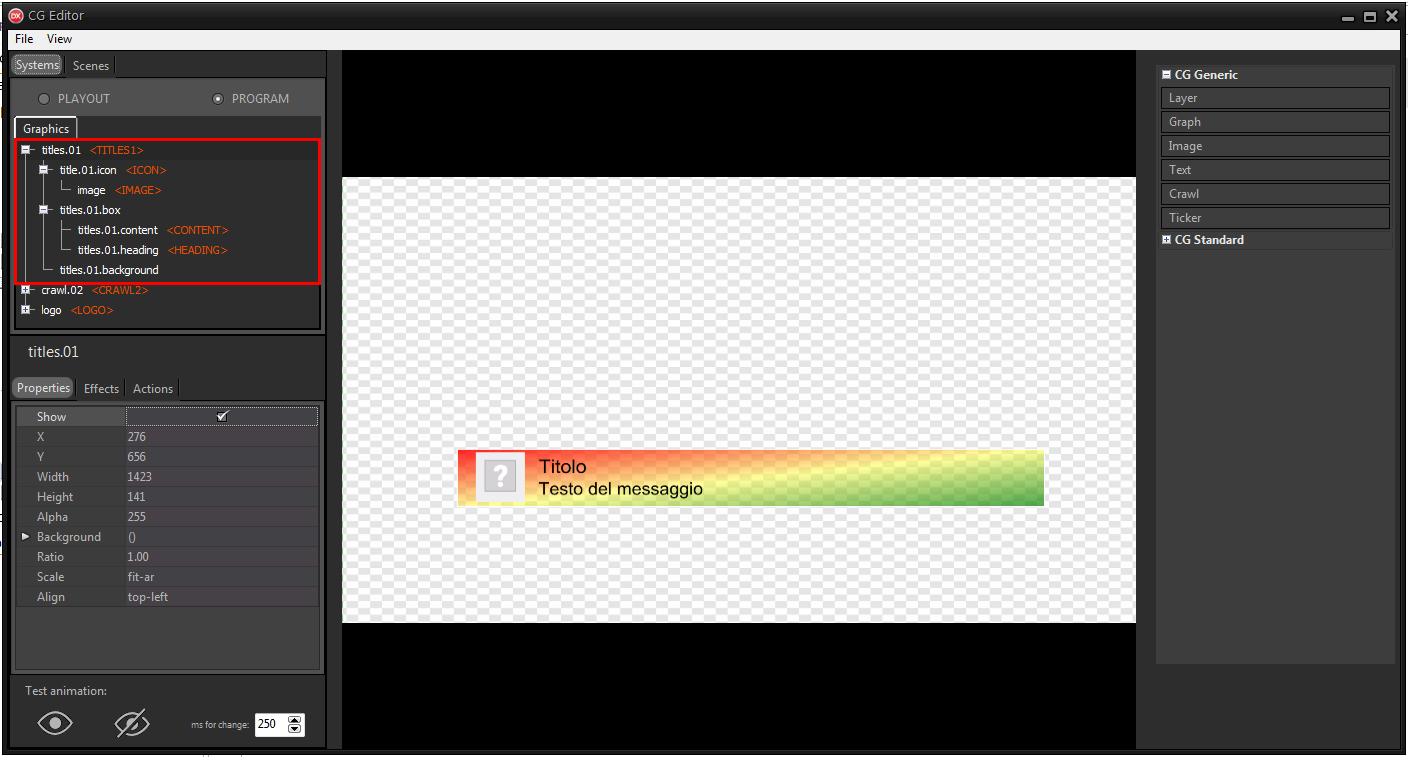
Other layers and objects can be added within the main group titles.01 to enrich the graphics of the girth. It is possible, for example, to create a background.
1.Drag a graph object from the CG Generic list to the central preview pane.
2.Insert the object into titles.01 and below all other objects.
The graph object draws a custom shape in the layer.
3.From the Properties section in the bottom panel choose the shape type and other parameters.
4.Use the Actions > Full screen option to resize the graph object and cover the entire area of titles.01.
The graph object is resized to the whole screen but adapted to the maximum dimensions allowed by the layer.
5.In the Effects section of the bottom panel, set effects and animations for objects.
6.Test the result using the Test animation buttons below.
Use the value on the side to increase or decrease the speed of the preview.

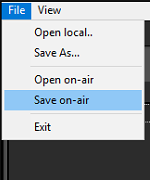
7.Click File > Save on-air to apply the changes to the CG on the air.

8.Then, on XautoTV click File > Reload to update the CG.

All the steps exposed for the creation of Titles 1 can be reused to create Titles 2 and Message.
In fact, the elements and placeholders of the three groups have a similar structure.
It is also possible to clone titles.01 and modify names and attributes of new objects.
Make sure that the main groups have the CG Group > <TITLES2> and <MESSAGE> placeholders.
XmessageTV and Xautomation allow you to choose which object to use to display messages.
To learn more about how the girths work and to have an example of how objects can be combined, drag the ready-made girths from the CG Standard list.
|
Copy the objects from the Program to the Playout. |
Hide all objects from the Program and from the Playout to prevent them from appearing when the CG on the air is reloaded.
The objects are shown automatically when appropriate.

