
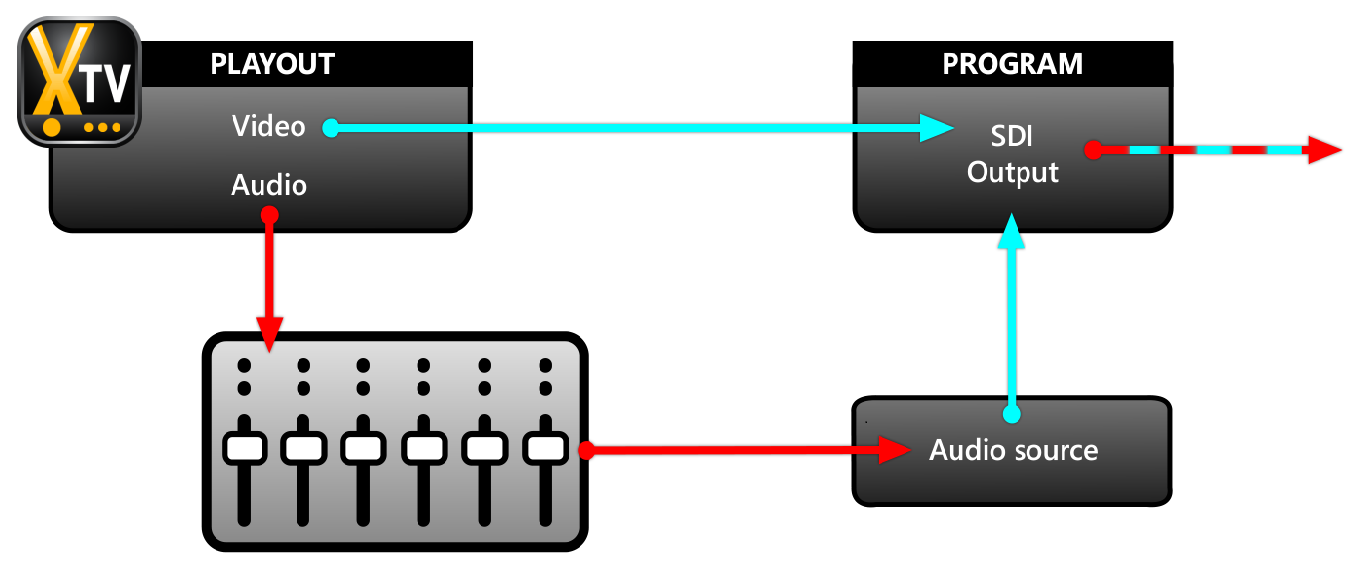
The DEFAULT scene uses only the Playout source to send audio and video to the main Program output on TV.
The DEFAULT scene alone can be used without additional modification by the user in a context in which it is not necessary to use an external mixer or manage cameras, microphones and other sources.

To create a more complex workflow, such as radio/TV, you need to bring the playout audio to a mixer and set up other scenes that contain additional audio/video sources.
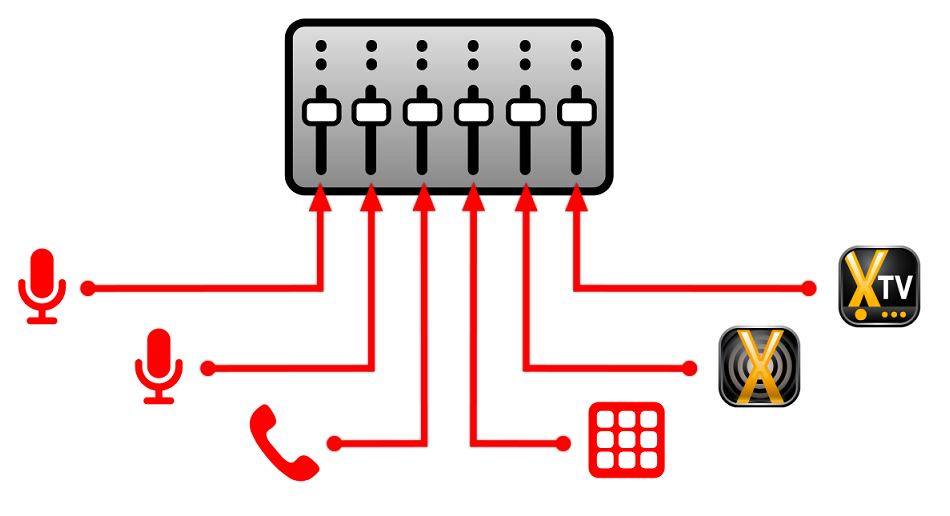
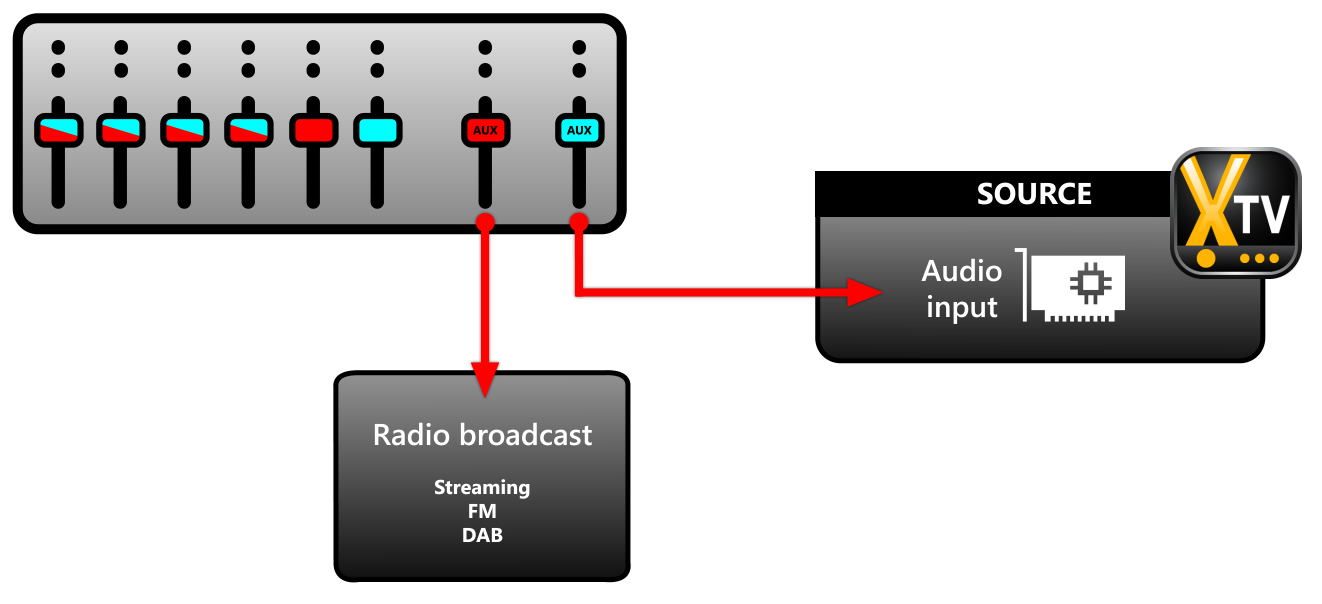
The broadcaster must already have a mixer available on which the individual signals from the microphones, telephone hybrid, jingle palette, Xautomation playout and XautoTV playout arrive.
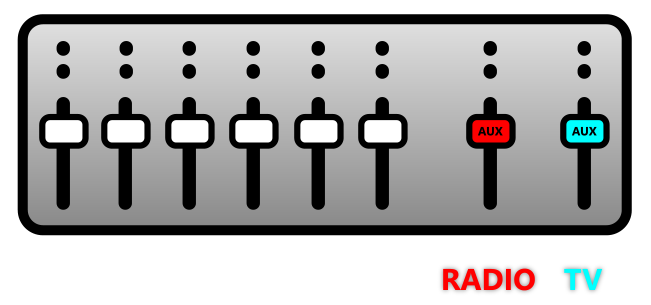
The mixer must have at least two AUX outputs, one for the radio channel and one for the TV channel, with the possibility of distributing the individual signals and excluding the channels from the outputs.
The mixer receives the signal from Xautomation's On Air sound card and associates it with a stereo channel.
To have the sound of the video clips on another channel, it is necessary to extract the audio from the XautoTV playout.
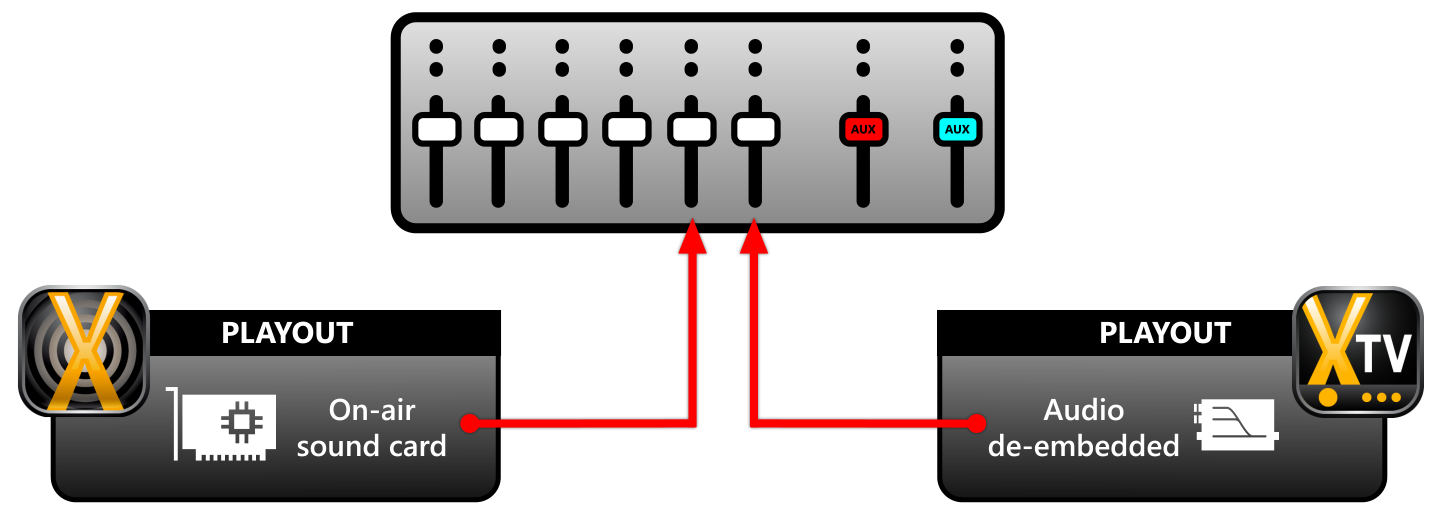
To extract the audio of the playout it is possible to use a physical de-embedder that separates the audio from the video starting from a single SDI signal.
The de-embedder allows you to have the audio of the playout on analog or digital audio cables (e.g. in AES-EBU format).
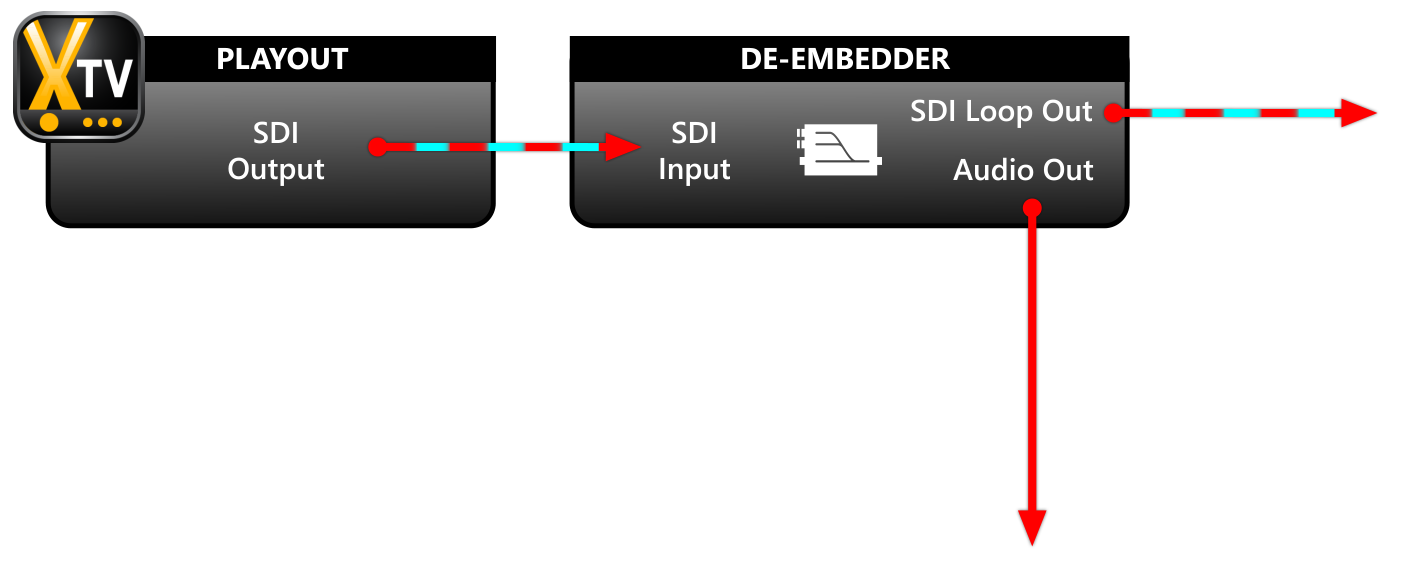
On XautoTV click on Edit > Settings > Audio Video device.
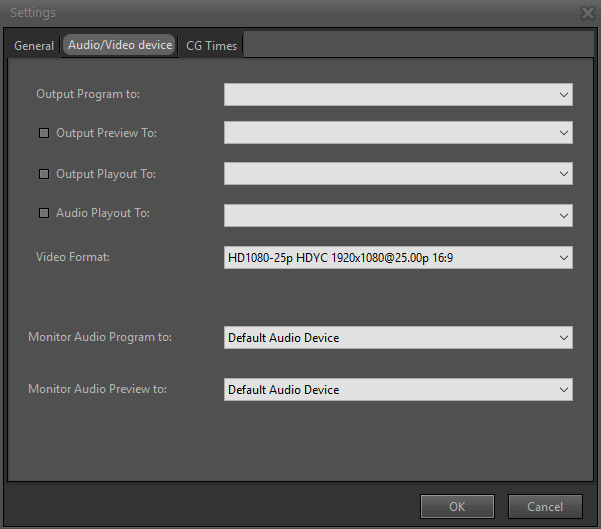
Enable the Output Playout To: option and select the SDI output to be connected to the input of the de-embedder.
Alternatively, you can take advantage of a sound card already present in the computer.
In this case, the audio can be extracted directly from XautoTV.
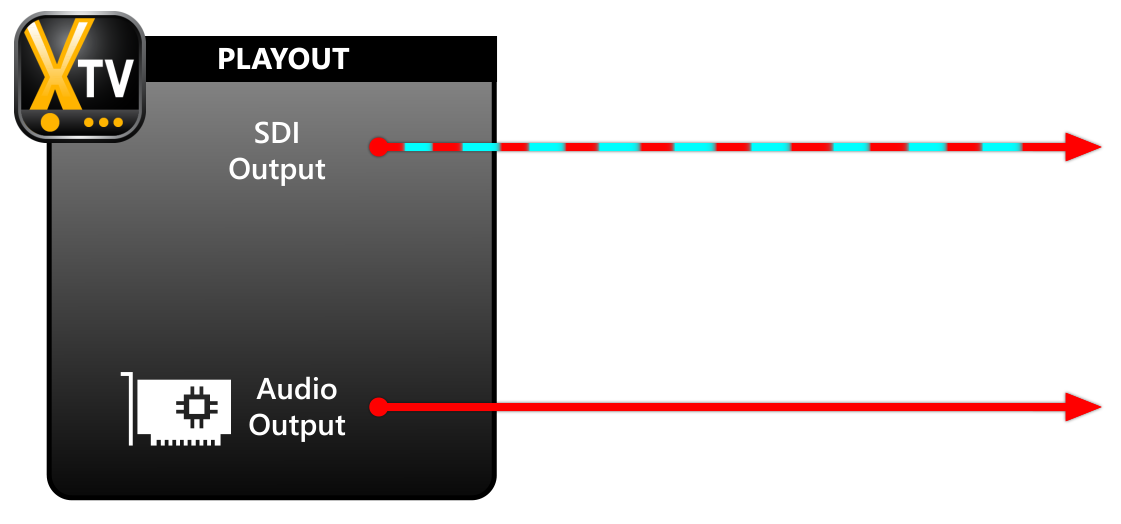
Enable the Audio Playout To: option and select the desired audio output.
Send the signal from the de-embedder or sound card to a stereo mixer channel.
In this way, the operator has control over the volume of Xautomation and XautoTV, on two separate channels.
Assign Xautomation to the AUX dedicated to the radio channel, assign XautoTV to the AUX dedicated to the TV channel and assign the remaining channels to both AUX.
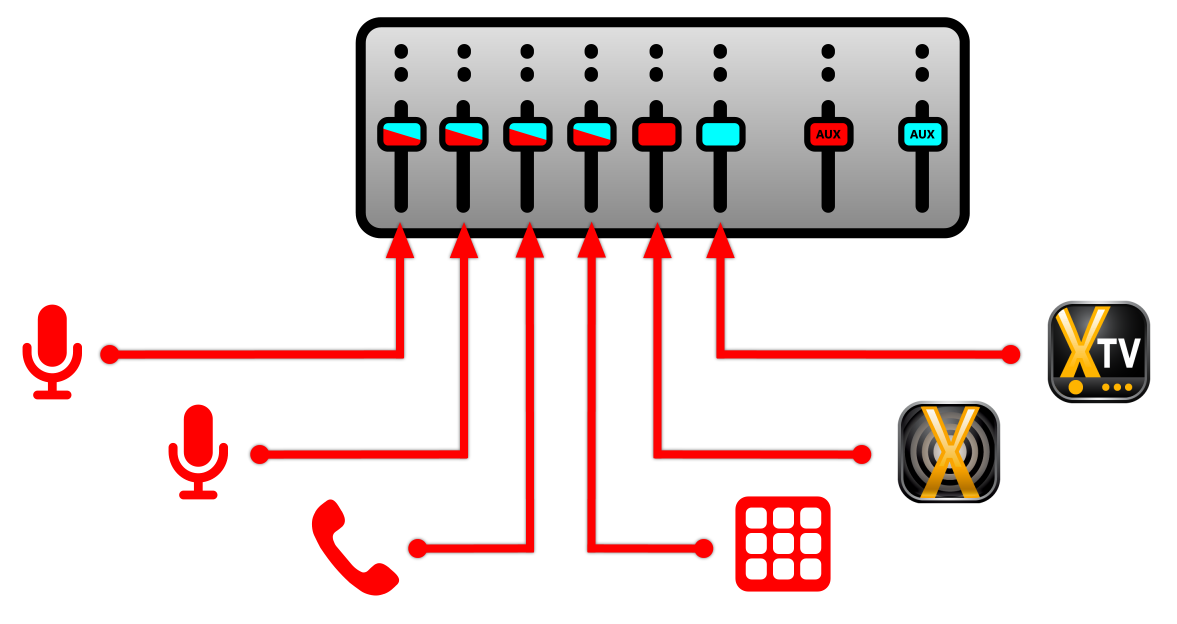
Connect the AUX TV to the PC sound card and acquire it on XautoTV as an external audio source.
On XeditingCG:
1.Click Scenes.
2.From the drop-down menu, select the DEFAULT scene and click on Sources.
3.Click Add source.
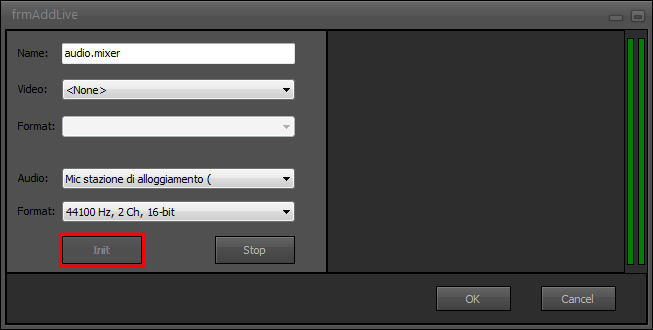
4.Rename the source to audio.mixer.
5.In the Video menu choose <None> while in the Audio menu choose the input that receives the AUX TV.
6.Set the Format.
7.Click Init and make sure the signal is arriving correctly.
8.Click on OK.
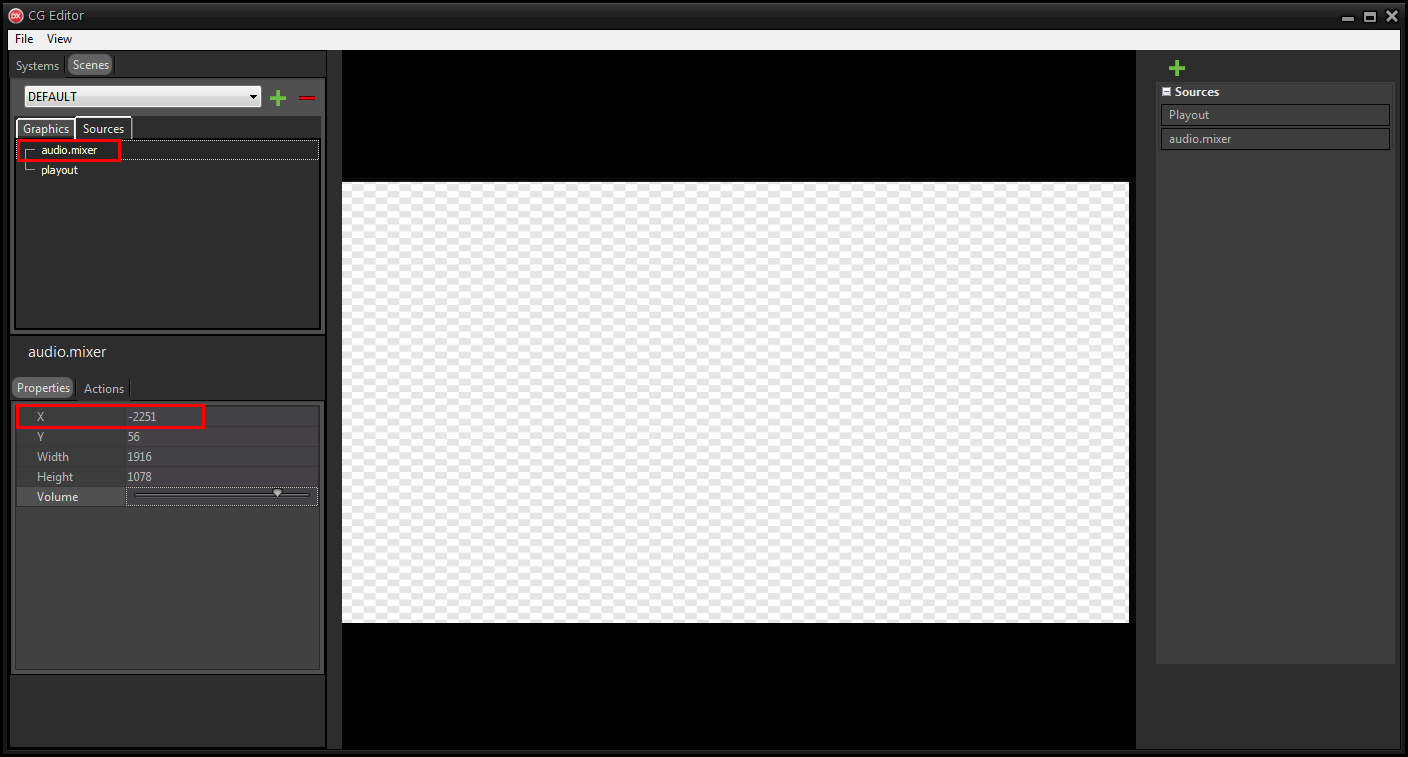
9.Drag the audio.mixer source onto the preview pane.
10.Select the source Playout.
11.From the bottom panel, minimize its volume.
The playout audio is already taken from the audio.mixer source, so playout must remain silent.
12.Select the audio.mixer source and move it off the screen.
If necessary, adjust the volume.
The radio / TV system requires the insertion of at least two other predefined scenes:
•SPEAKERFULL shows the conductors in full screen.
•SPEAKERBOX shows two boxes with conductors and playout.
To create the SPEAKERFULL scene:
1.In the Scenes section, click the Add scene button.
2.Give the new scene the name SPEAKERFULL.
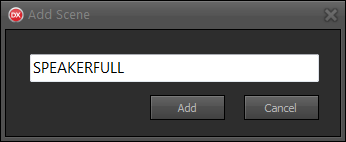
3.Click on Add.
4.Select SPEAKERFULL from the drop-down menu.
5.Click Sources > Add source.
6.Enter camera in the Name field.
7.In the Video menu choose the input that the cameras receive while in the Audio menu choose <No Audio>.
8.Click Init and make sure the cameras signal is arriving correctly.
9.Click on OK.
10.Drag the camera source and the audio.mixer source onto the preview pane.
11.Select the audio.mixer source and move it off the screen.
If necessary, adjust the volume.
To create the SPEAKERBOX scene:
1.In the Scenes section, click the Add scene button.
2.Give the new scene the name SPEAKERBOX.
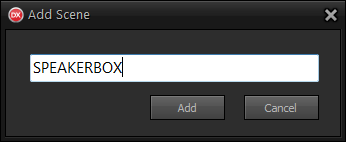
3.Click on Add.
4.Select SPEAKERBOX from the drop-down menu.
5.Click on Sources.
6.Drag the SPEAKERBOX scene, the playout source, the camera source and the audio.mixer source onto the preview pane.
7.Select the source Playout.
8.From the bottom panel, minimize its volume.
9.Select the audio.mixer source and move the source off the screen.
If necessary, adjust the volume.
10.Change position and size of playout and camera.
Place two boxes side by side or overlap the sources in order to create a picture-in-picture.
It is also possible to define other scenes, according to user needs, with sources positioned differently. For example, a scene with a speaker box and one with an online press review.
We recommend that you assign the same background to the scenes so that when the scenes change on TV you do not see the background completely black during transitions.
Click File > Save on-air to apply the changes to the CG on the air.
On XautoTV click File > Reload to update the CG.
The audio that enters XautoTV through the audio.mixer source suffers latency due to the passage of signal between the de-embedder, the mixer and the sound card.
The video of the playout is therefore ahead of the audio of the incoming mixer.
It is necessary to add the delay in order to synchronize it with the audio of the video clips taken from audio.mixer.
In the PROGRAM AUDIO MIXER section, activate the Delay and Audio out options for the Playout source.
|
The options must both be active. |
The Audio out option excludes the audio output to the de-embedder or from the sound card from the delay.
Adjust the delay by setting a value in milliseconds.
It is possible to check the increase in delay and sync with the audio by watching the main Program output.
To monitor the Program output you can use an SDI-to-HDMI converter and a normal HDMI screen.
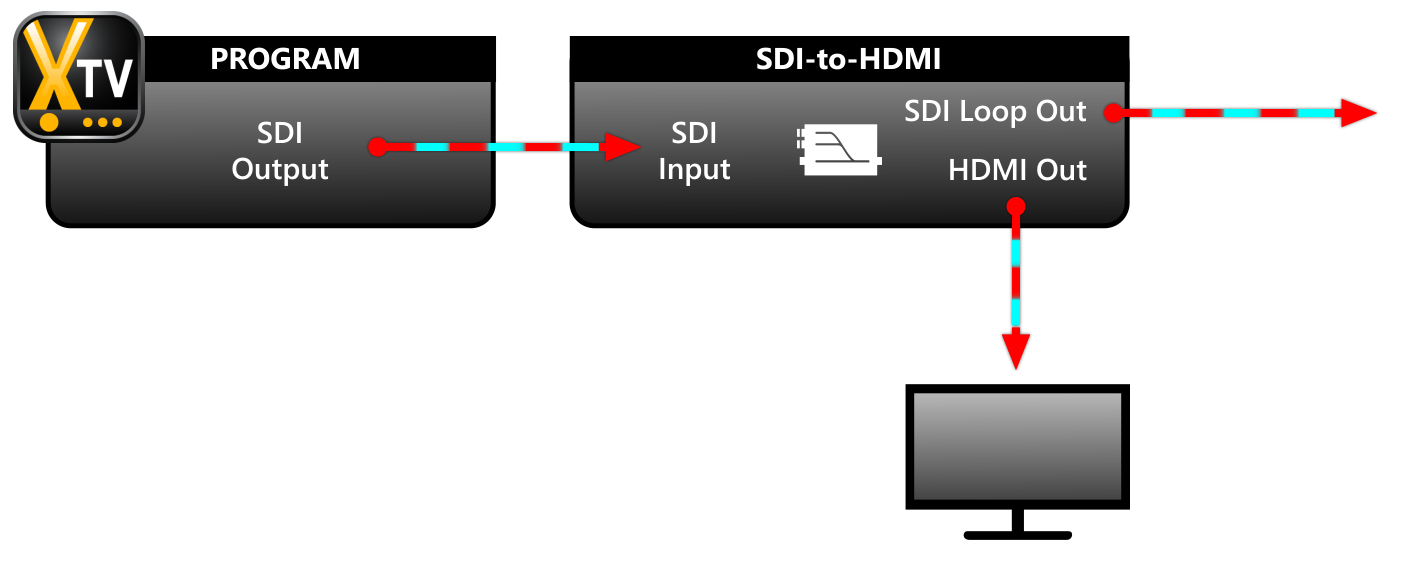
The converter must receive the signal from the output set in Edit > Settings > Audio/Video device > Output Program to:.
It is possible to connect an SDI signal distributor, which receives the Program and sends it to the converter and other devices.

On Xautomation set the properties of bases and acronyms of the programs to change the scene when the element is aired.
It is possible to change the scenes from the Xautomation video commands.
Click Video > Show Video Commands to enable the video command bar.
The first three buttons activate the DEFAULT scene  , the SPEAKERFULL scene
  and the SPEAKERBOX scene
  .
.
To manually control the scene change at the track skip select the desired scene from the drop-down menu  .
.
Click Run Command Immediately  to change the scene on the air.
It can be used, for example, on the OUTRO of a track, to make a announcement by activating SPEAKERBOX.
Select the scene from the menu to activate the skip.
Then, click Enable automatic video switch  .
.
|
If the switch is enabled, XautoTV activates the selected scene when the track ends or manually passes to the next item. The DEFAULT scene is activated only when the INTRO marker of the current track is reached. Alternatively, activate the Bypass change scene |


