
The Scenes section of XeditingCG allows you to add new scenes and initialize new alternative audio/video sources to the playout.
A scene can contain multiple audio/video sources and graphic elements that must appear only when the scene is active.
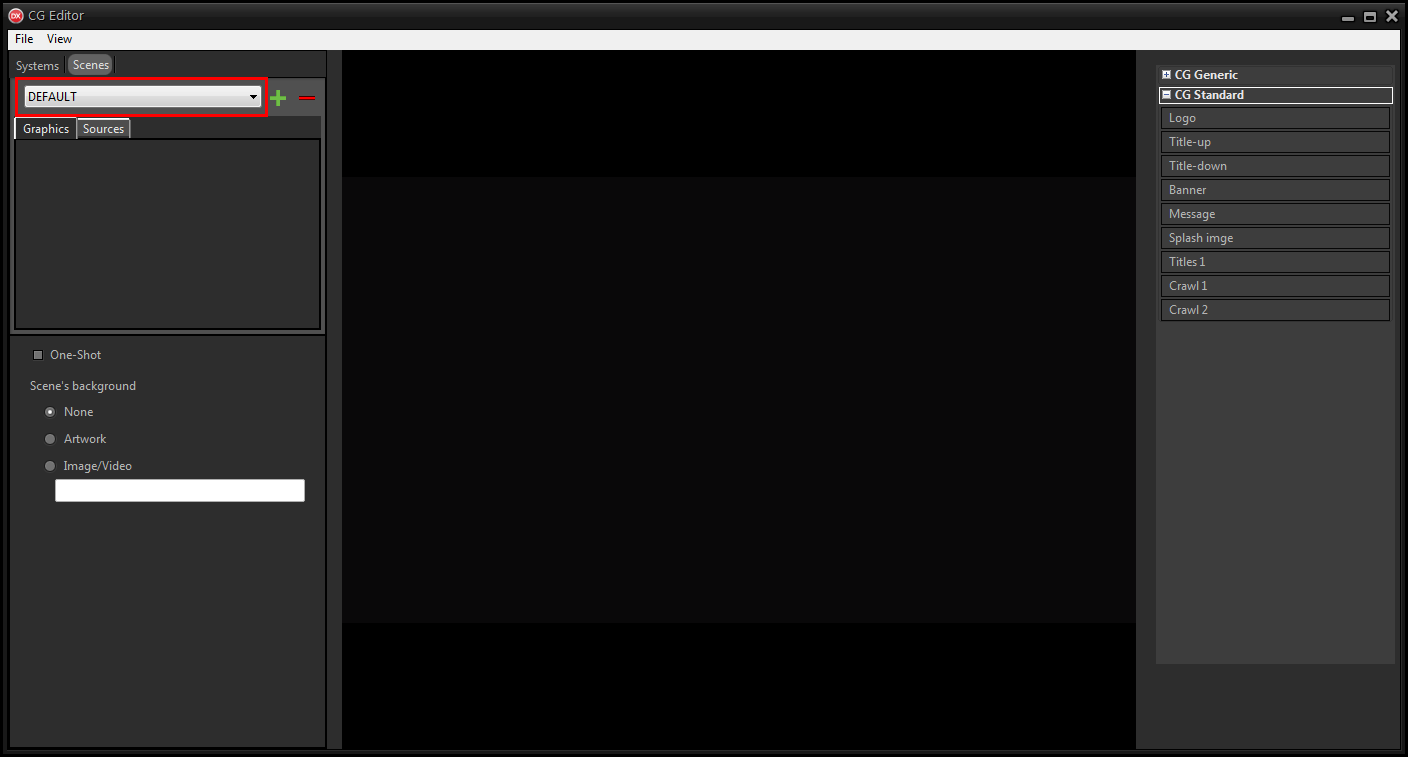
The drop-down menu allows you to select the scene on which to make the changes.
|
At the first start the CG already contains a scene called DEFAULT. It is the default scene that is activated at each skip of the songs and that shows the playout in full screen. |
The selected scene shows the Graphics sections for inserting graphics and Sources for inserting sources.
To create a scene:
1.Click on Add scenes  .
.
2.Choose the name for the new scene.
3.Click Add to confirm or Cancel to cancel.
4.Select the scene from the drop-down menu and move to the Sources section.
The list on the right shows the initialized audio / video sources. At the first start the only available source is the Playout.
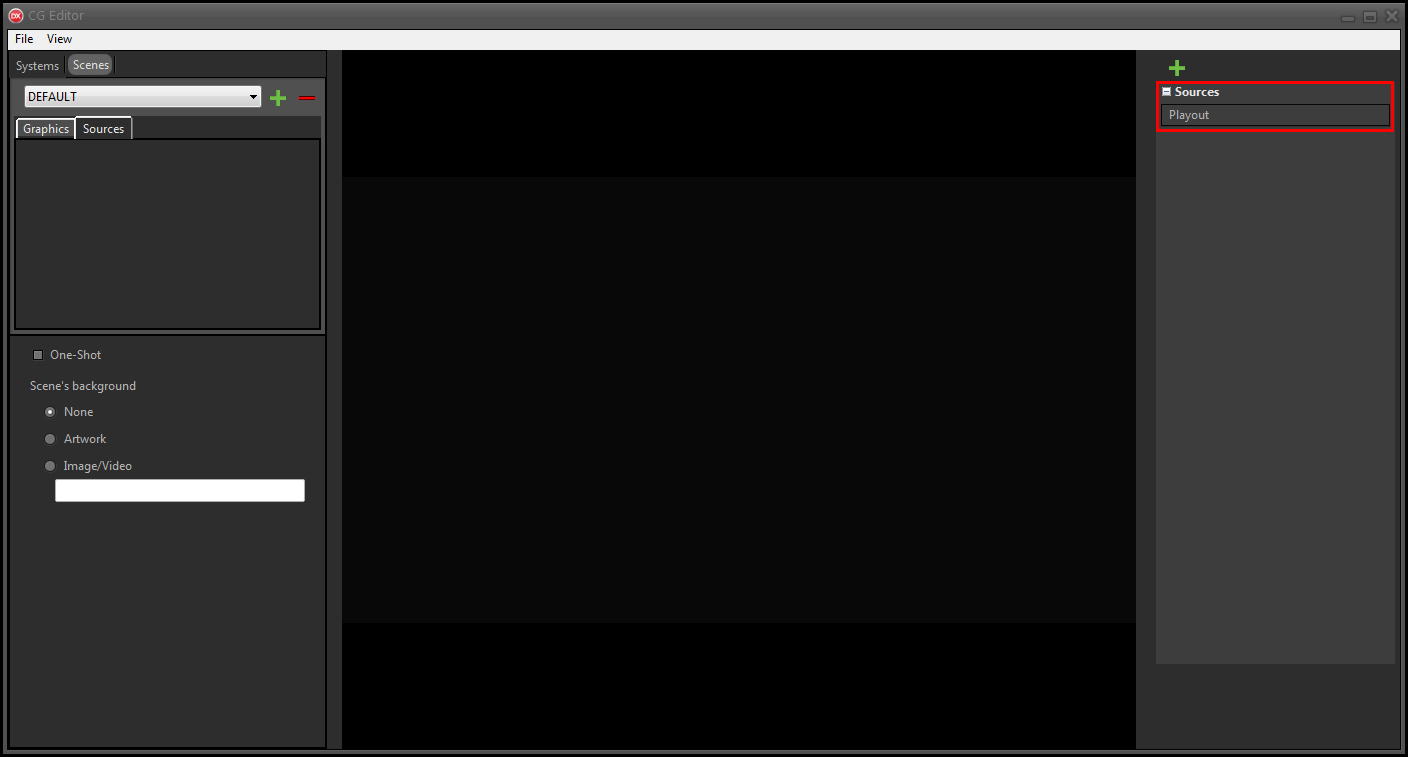
5.Click Add sources  .
.
6.Assign a name and select the source type and format.
If the source captures video, select a Blackmagic card, USB capture device, NDI or screen capture.
If the source acquires audio, select the desired sound card input.
Select <None> or <No audio> when the source does not require video but acquires only audio or vice versa.
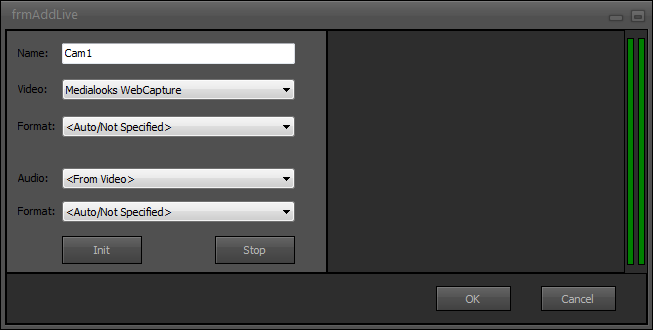
7.Click Init to initialize the source.
8.Click on OK.
9.Drag the sources from the list to the right into the preview pane in the center.
The source appears in the list on the left.
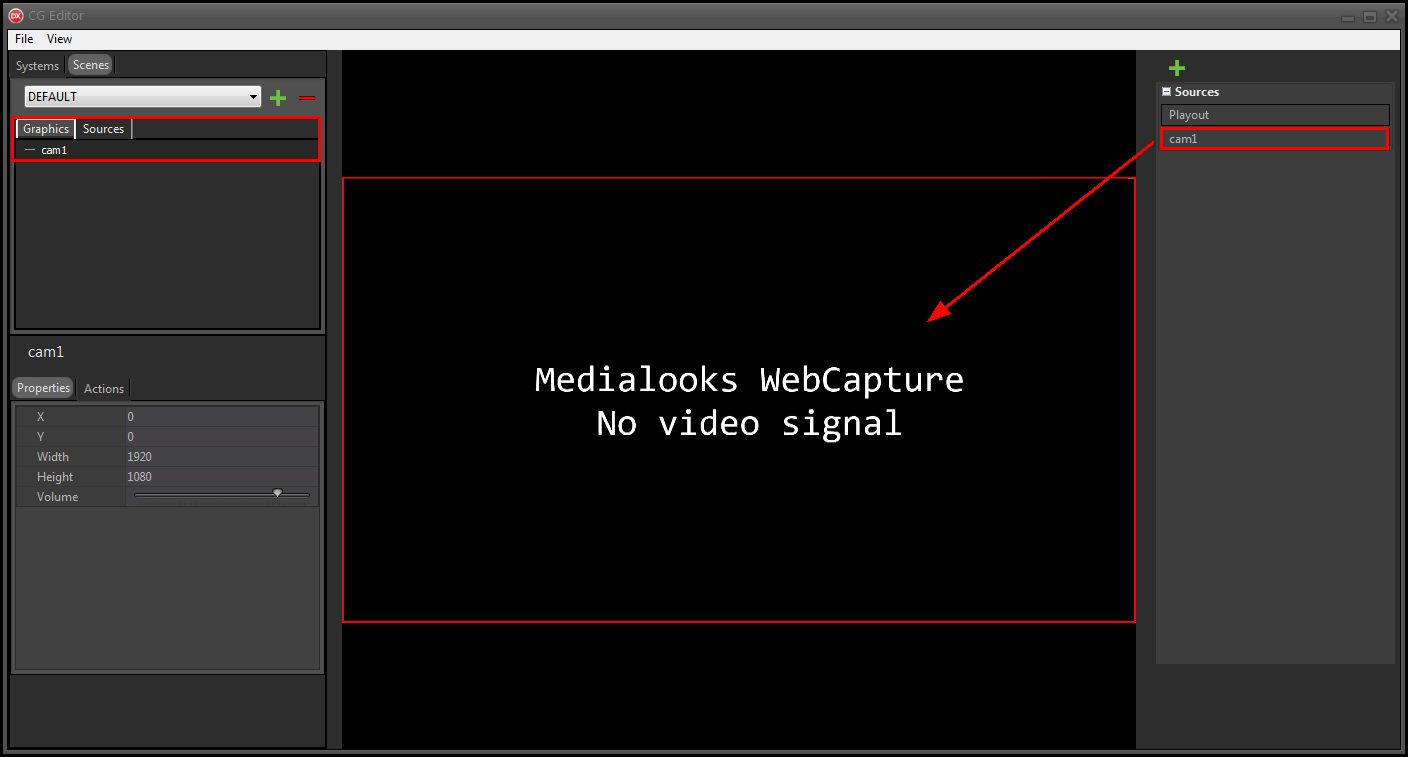
10.Selecting the source, the attribute panel appears at the bottom.
The Properties section allows you to change the position, size and initial audio volume of the source.
The Actions section allows you to realign the selected source or enlarge it to full screen.
Size and position can also be changed by selecting the source and dragging or resizing it from the preview pane in the center.
Sources can be selected from the list on the left or by clicking on the source in the preview pane.
Resizing the source with drag-and-drop automatically maintains the original aspect ratio.
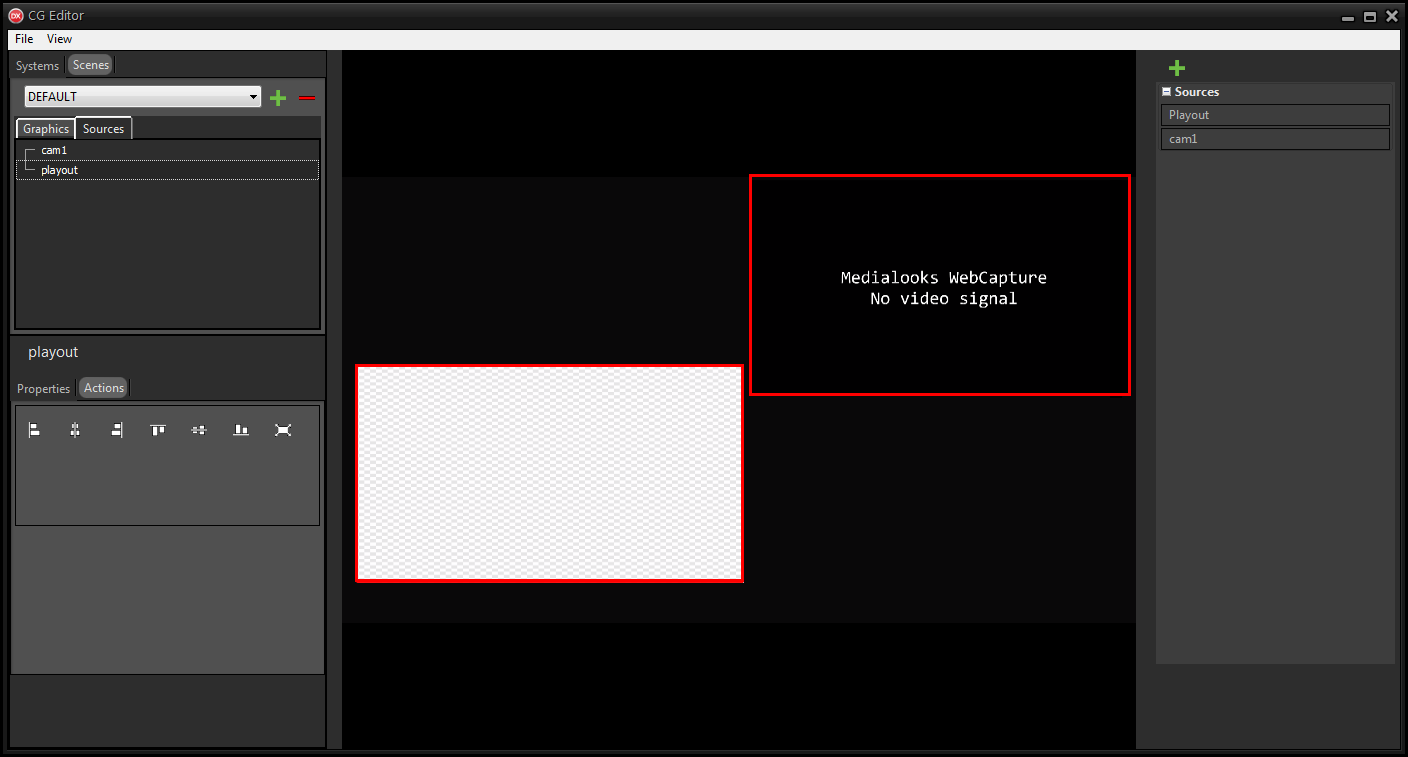
|
In case of audio source only, position and size are completely irrelevant. We recommend moving the source off the screen to avoid accidentally selecting it from the preview pane. |
To decide the stacking order, move the sources up or down in the list on the left.
The top sources are shown in front of the bottom ones.
|
By clicking on a source in the central pane, the preview is immediately put in the foreground but the order chosen in the list on the left is not changed and remains the definitive. |
In the Graphics section you can add graphic objects from the lists on the right and manage the graphics that must appear only when the reference scene is active.
It is possible to apply a background to the whole scene, inserting the path to an image or using the cover of the track on the air.
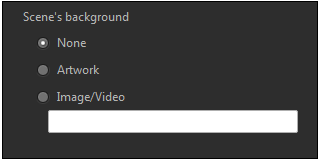
After adding scenes, click File > Save on-air to apply the changes on the aired CG.
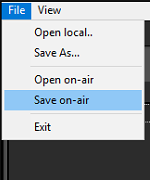
Then, on XautoTV click File > Reload to update the CG.

On XautoTV the SOURCES section is shown at the bottom left with the previews of all the sources initialized and any audio input signal.
In the Preview section, choose a scene to prepare in preview and click on the Send to Program button to immediately broadcast it.
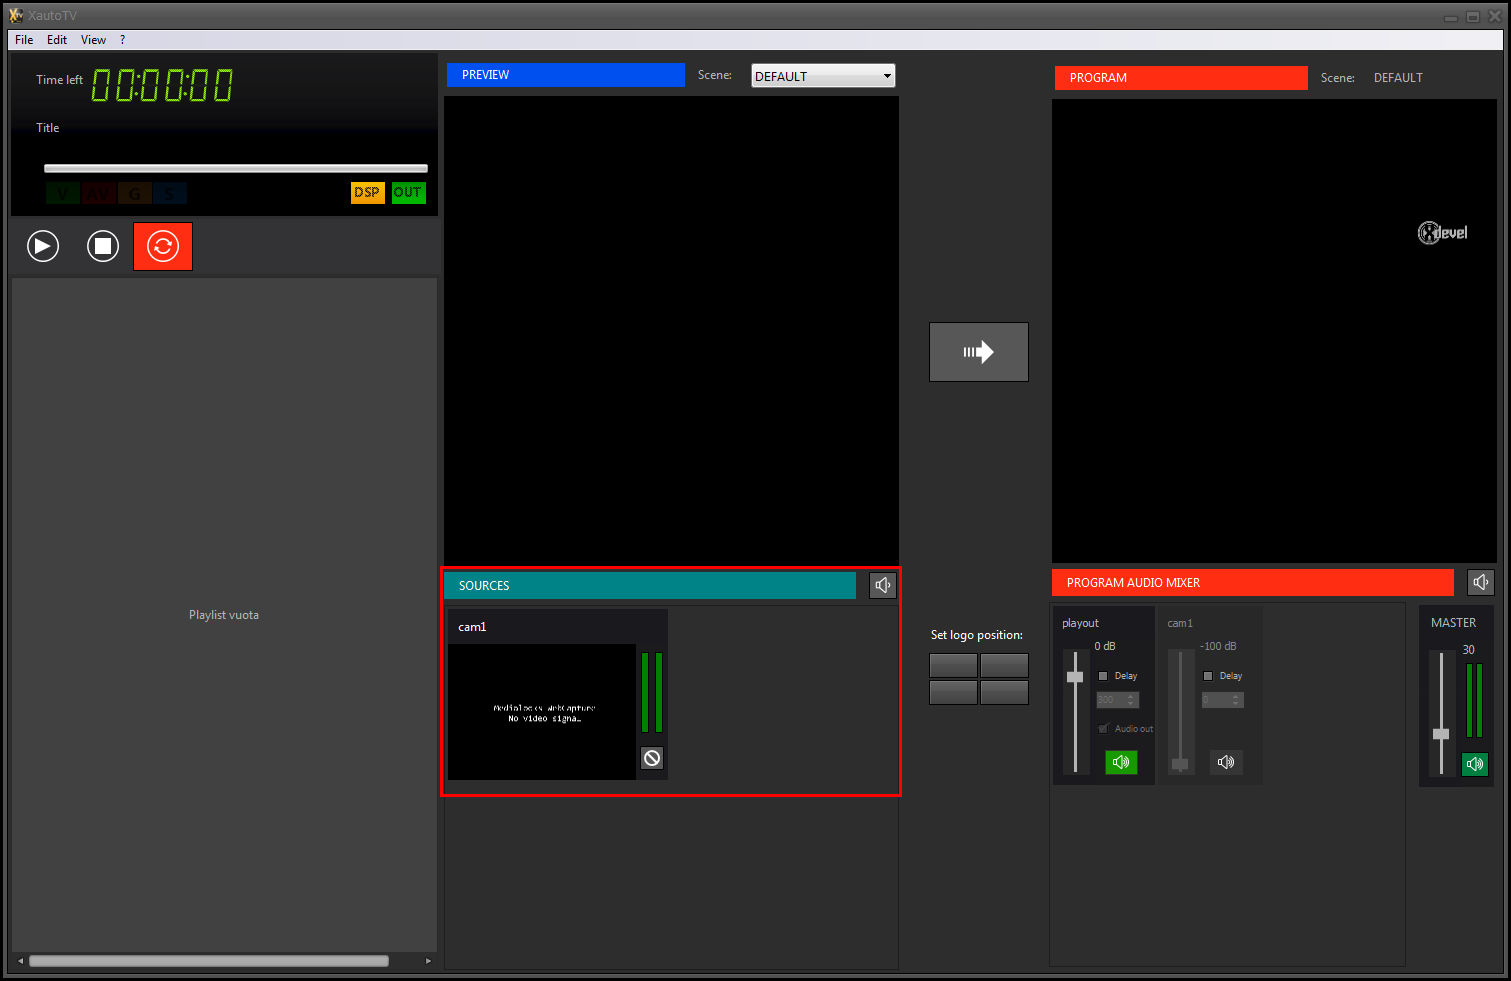
The Mute  button allows you to temporarily disable a source.
The PROGRAM AUDIO MIXER section is shown on the right with the source volume and delay controls. Sources that are not part of the active scene are automatically excluded from the controls.
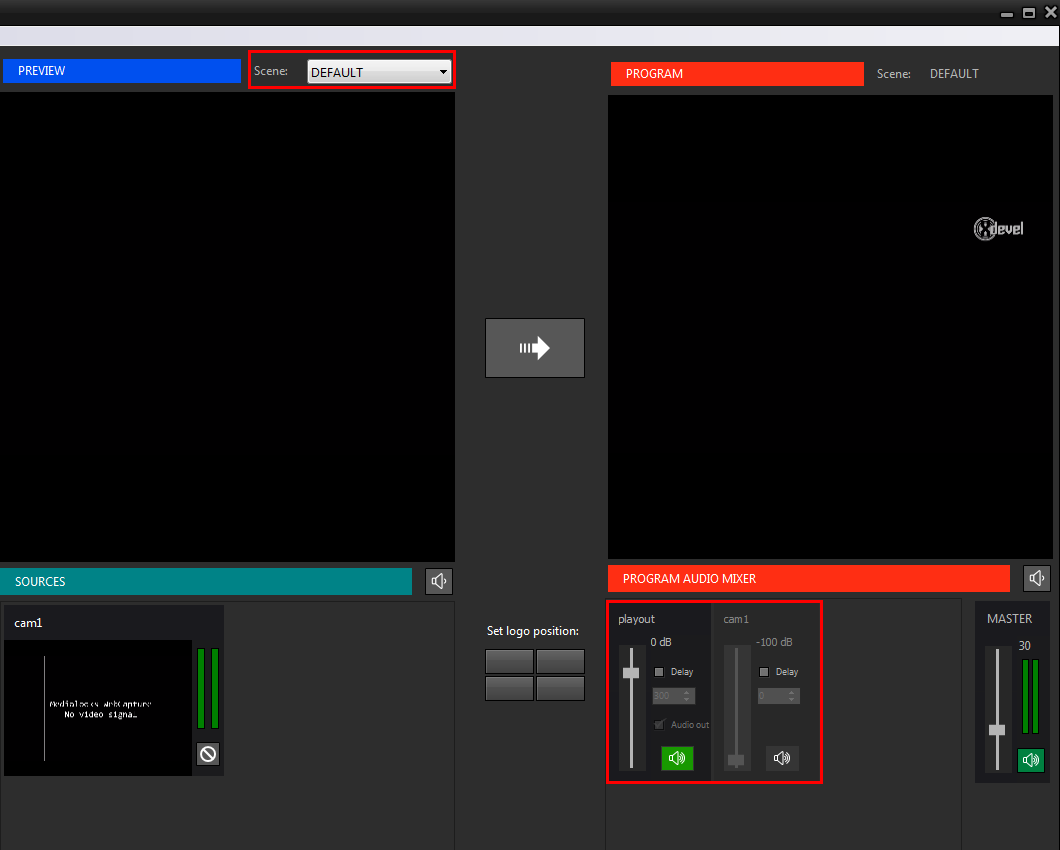
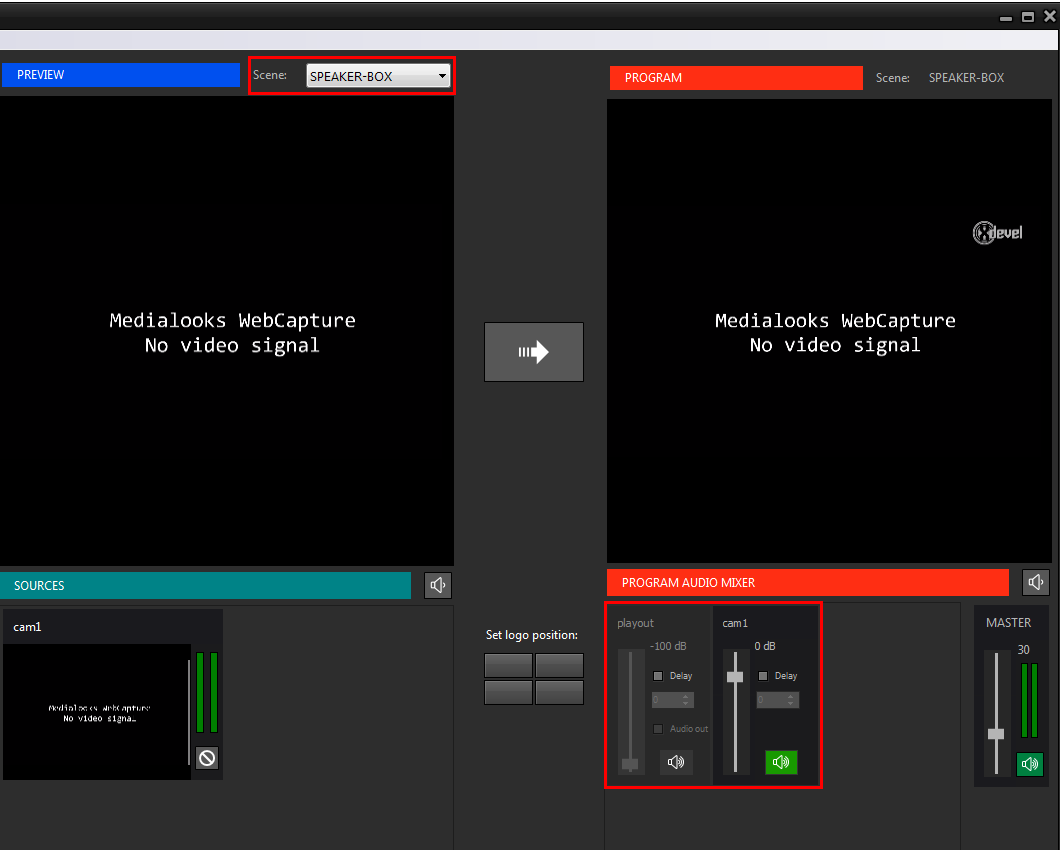
Using the Delay option, delays both the video and audio of the source.
If necessary, apply the delay by enabling the Delay option and entering a value in milliseconds.
It is possible to modify the scene on the air according to the tracks played by Xautomation.
On Xautomation:
1.Select one or more tracks and access to the Properties.
2.In the Video Mixer section, enable the Scenario option and select the desired scene.
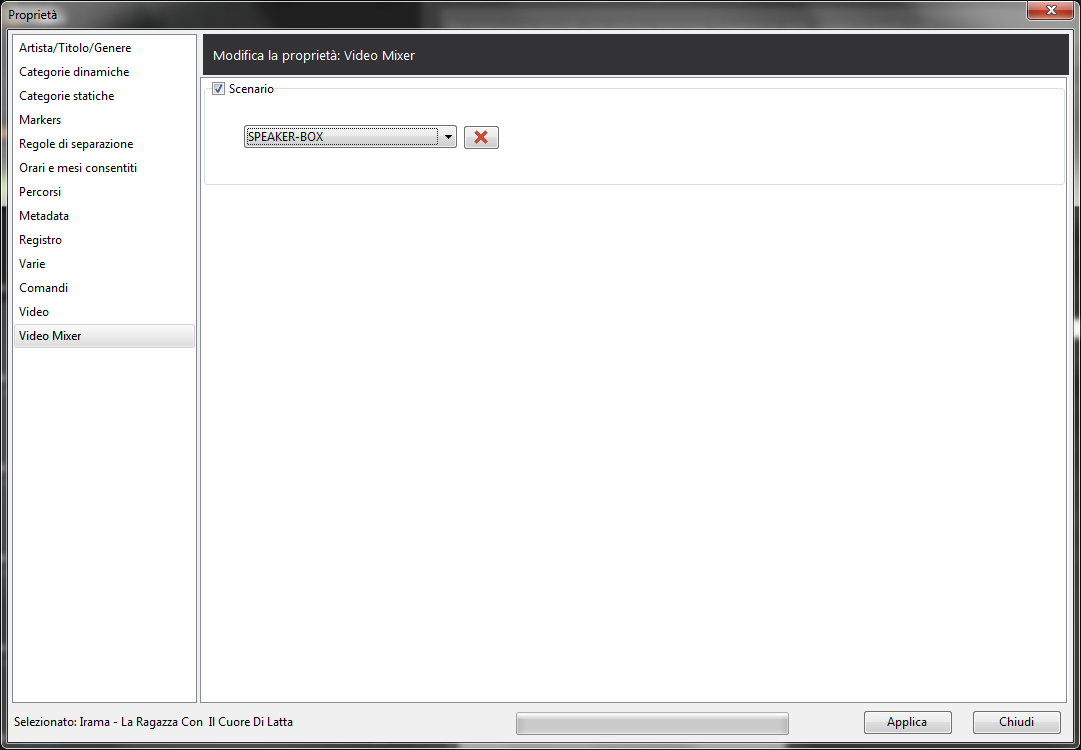
3.Click Apply, then Close.
|
XautoTV automatically shows the DEFAULT scene or the scene assigned to the next track after manual or automatic skip. It is possible to avoid any automatic scene change by enabling the Bypass change scene button |
Start playback on Xautomation and check the changes made on the CG and on the archive.
Remember to save the archive at the end of the works.


